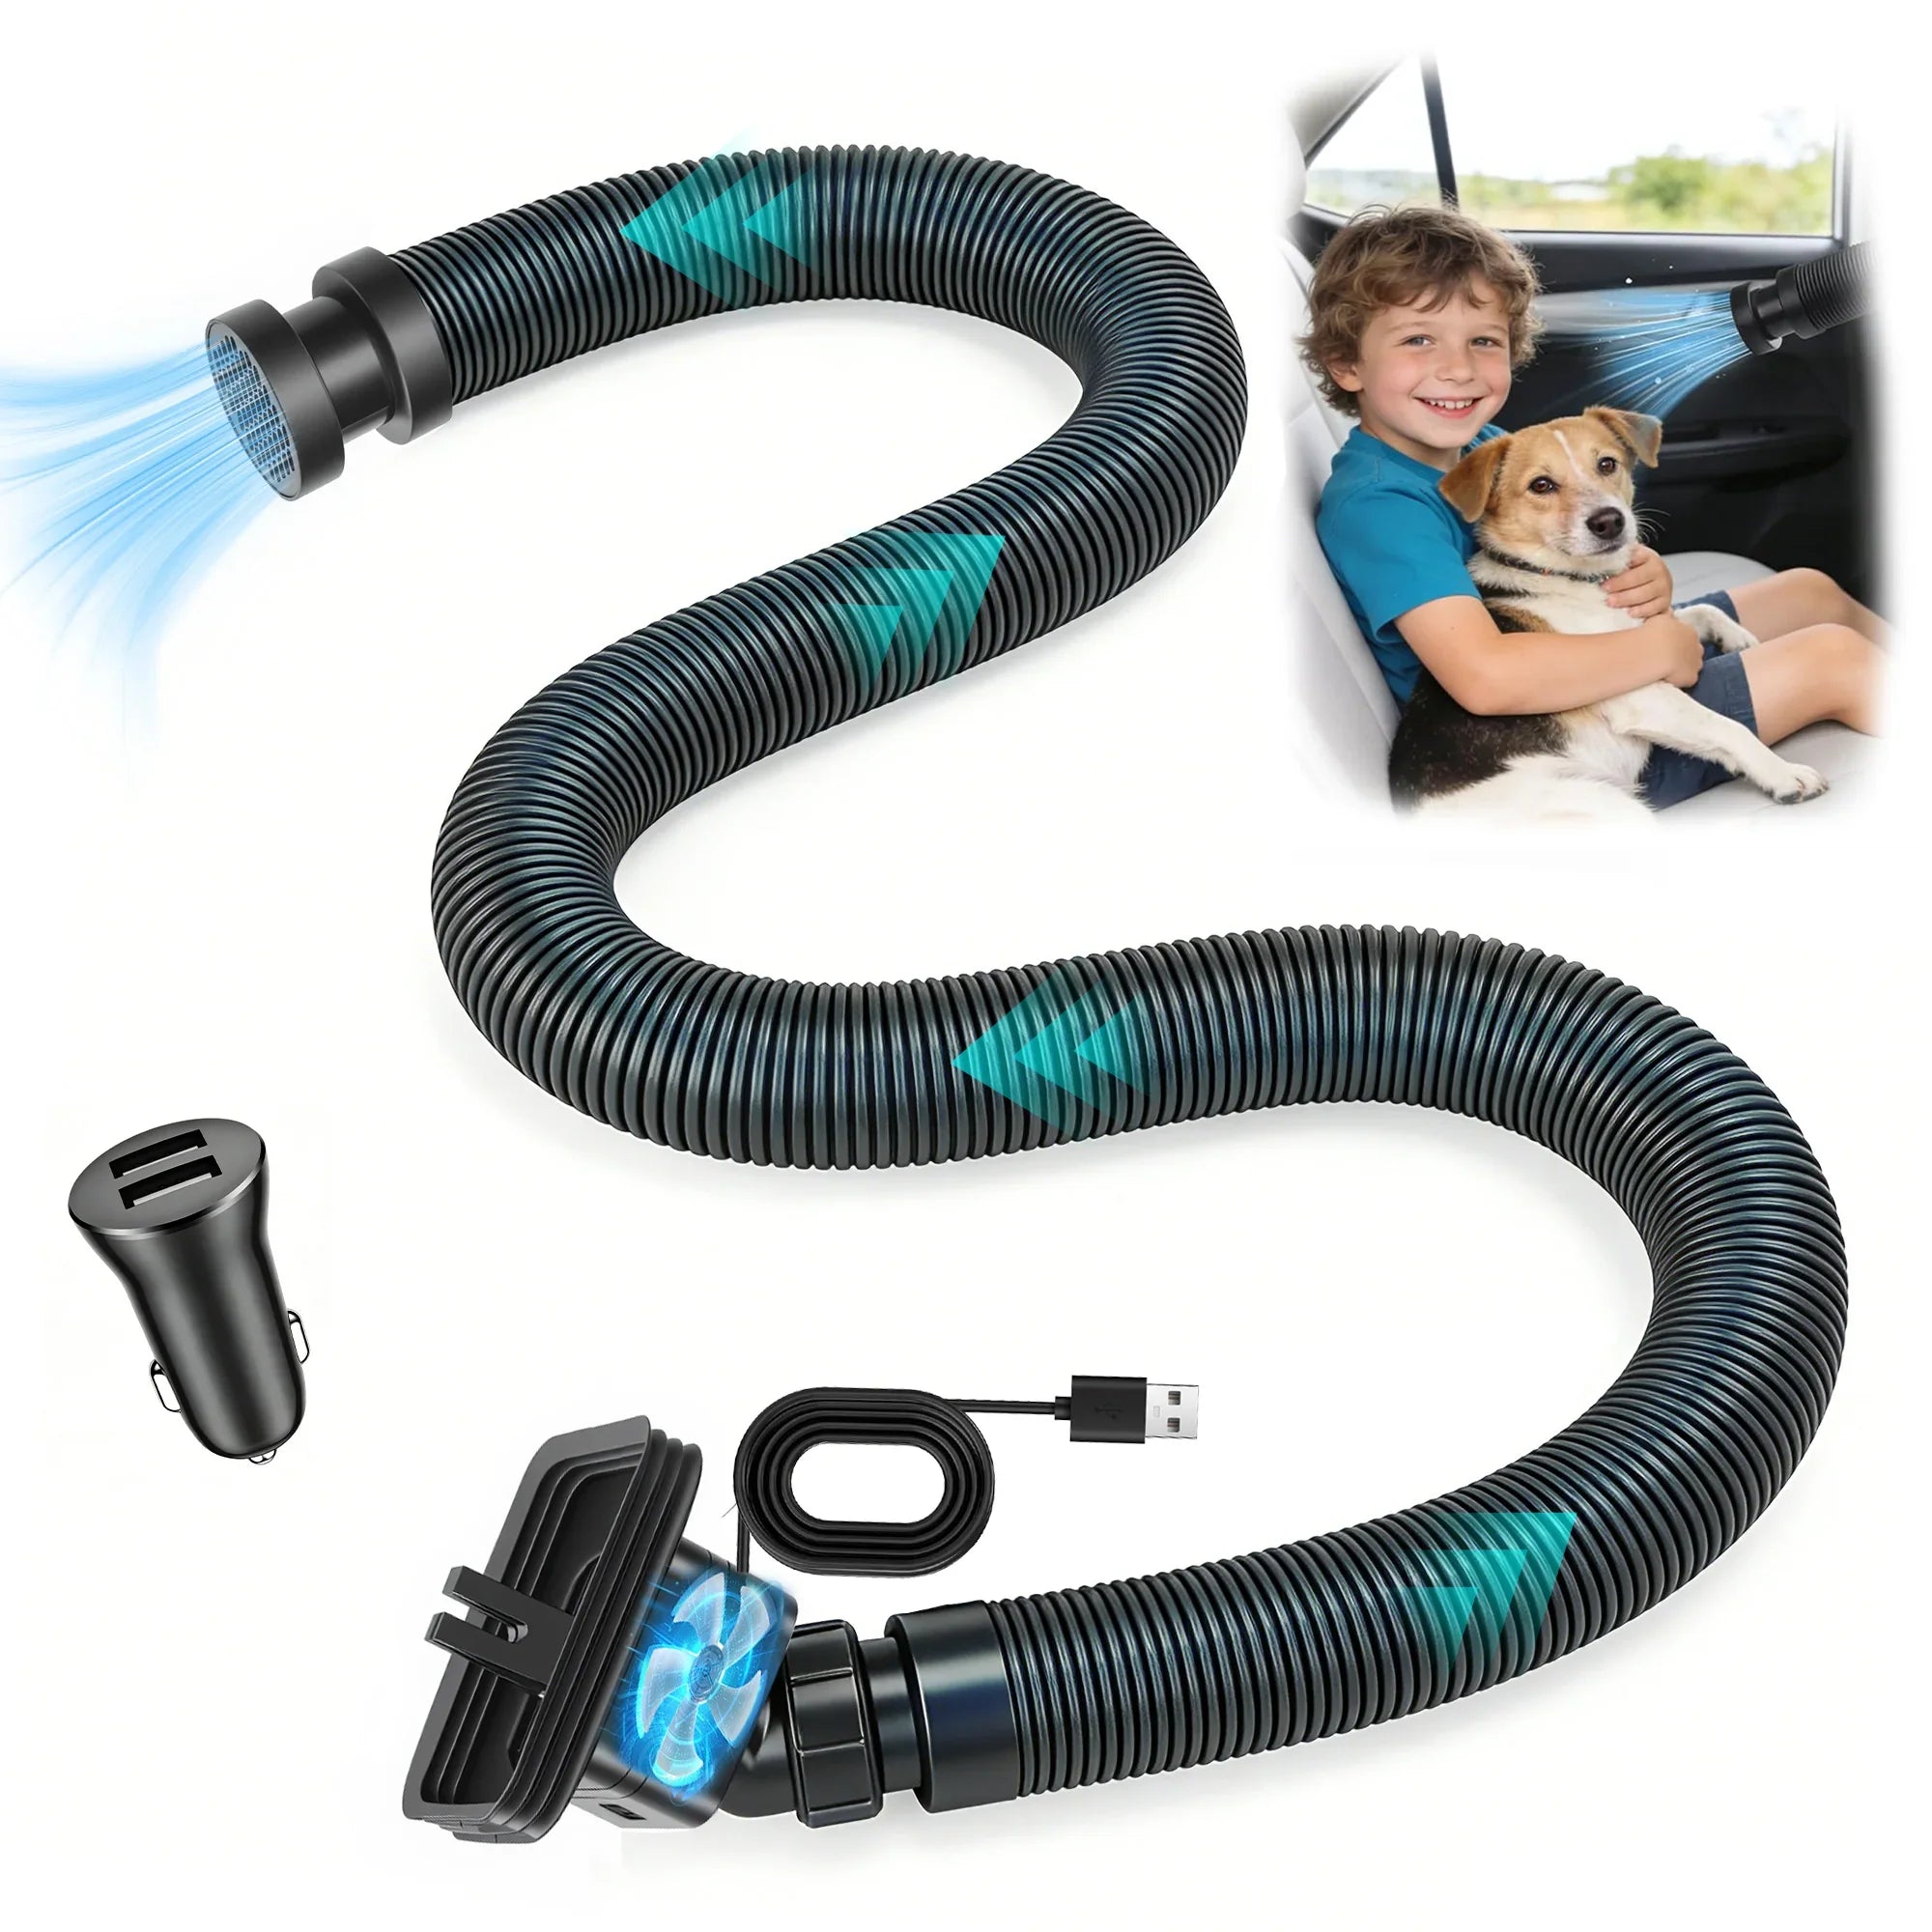
You bought a car AC vent extender because your third row, dog crate, or rear passengers were always too hot. But after installing it, the airflow feels weak and you start wondering: Did I buy the wrong product?
In many cases, the extender itself is not the problem. Small installation mistakes — a loose vent connection, sharp hose bends, poor positioning, or blocked airflow — can significantly reduce how much conditioned air reaches the back.
Many drivers expect the same powerful airflow they feel from the dashboard vent, but the rear seats are much farther away. Proper setup matters.
Before replacing your extender, check these common mistakes. A few small adjustments can make a noticeable difference.
Mistake 1: Leaving Gaps Between the Vent and Extender Connection
One of the most overlooked problems is air leakage at the dashboard connection.
Your vehicle’s AC system already works hard to cool or heat the cabin. If the extender connection does not seal properly, some airflow escapes before it ever enters the hose.
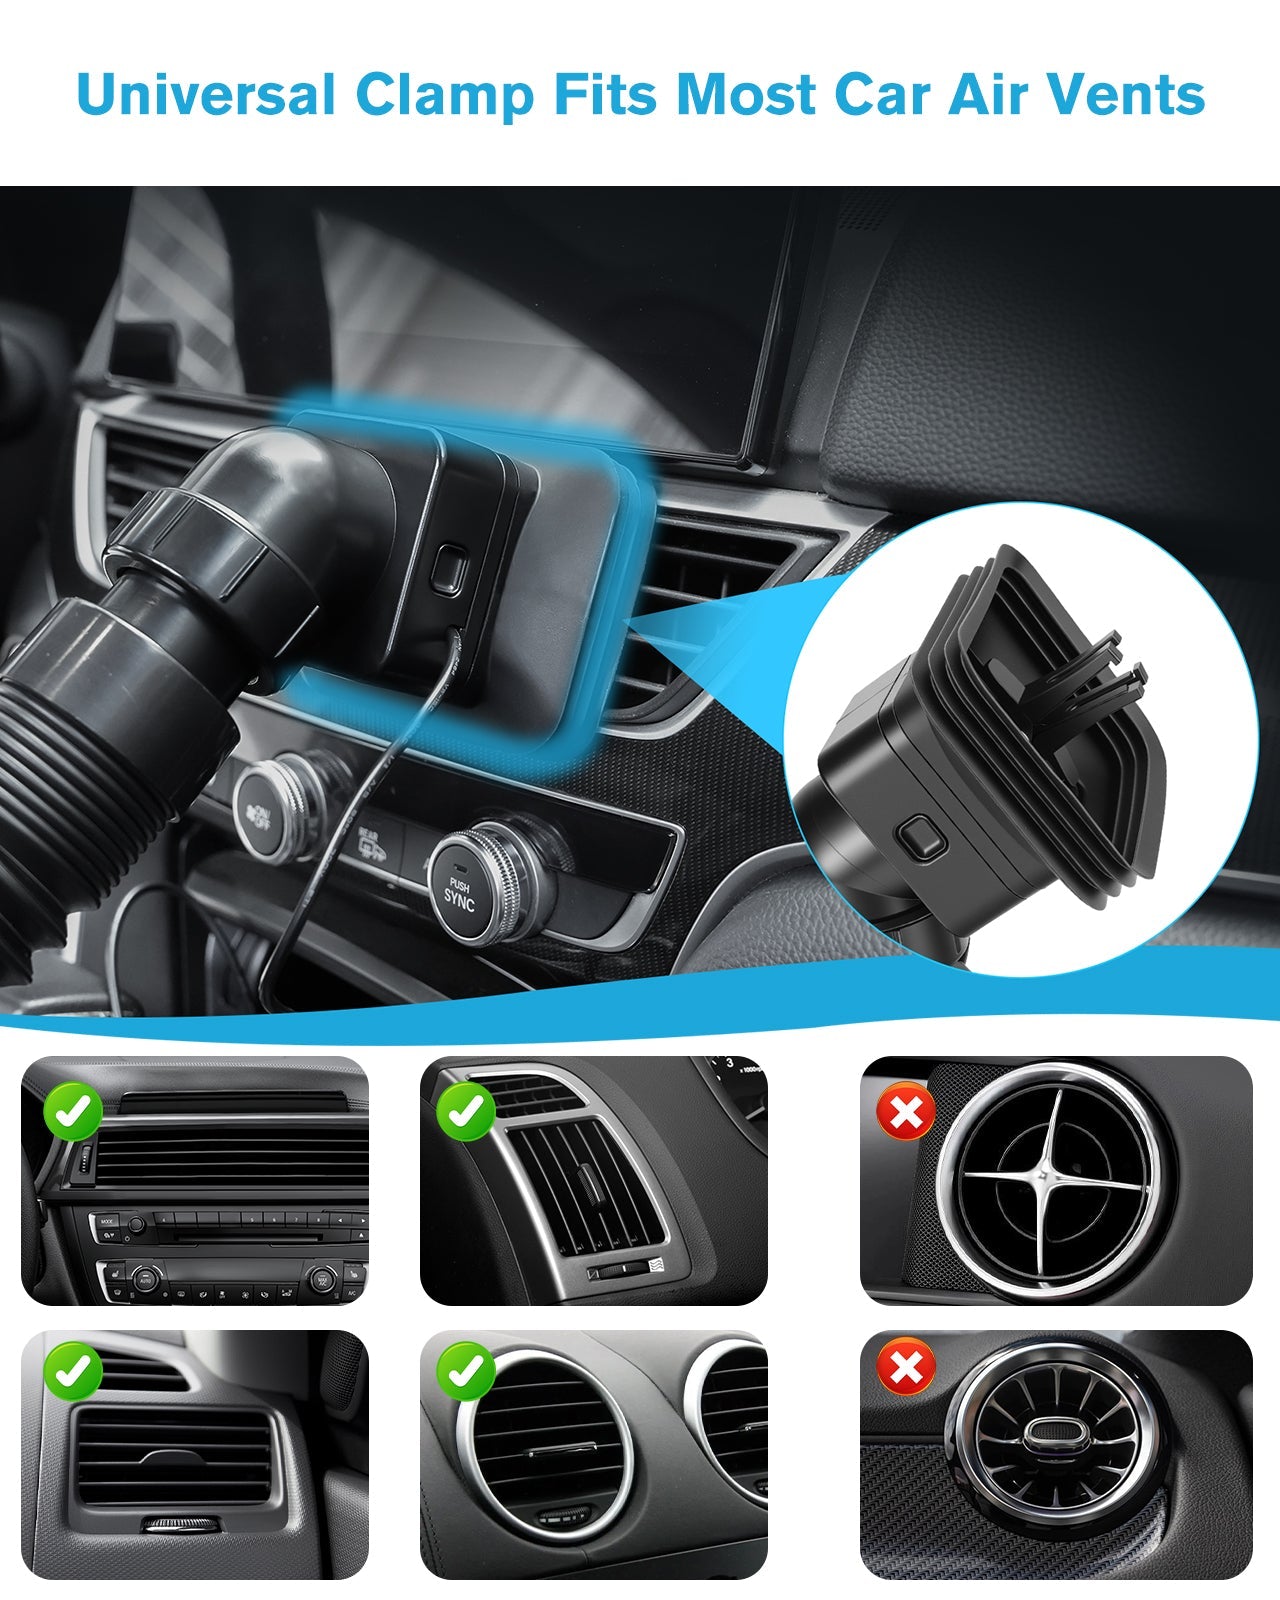
This is why a quality extender should not simply clip onto the vent and rely on pressure alone.
A better design uses a soft rubber sealing gasket that creates a tighter connection between the dashboard vent and the hose base. This helps reduce wasted airflow and allows more climate-controlled air to travel toward the rear seats.
Many budget vent extenders skip this sealing step, which can lead to weaker performance — especially in larger SUVs where the air has farther to travel.
A fan-powered AC vent extender with a sealed connection helps solve this common issue from the start.
Mistake 2: Installing the Clip Without Checking Stability
A rear-seat cooling accessory is only useful if it stays where you put it.
Loose clips are frustrating. You adjust the extender before every drive, hit a bump on the road, and suddenly the nozzle points somewhere completely different.
The mounting clip should grip firmly onto the dashboard vent without damaging the vent blades.
Reinforced adjustable clips are especially helpful for SUVs and trucks that experience longer drives, rough roads, or frequent family trips.
After installation, give the connection a gentle pull test. If it moves easily, adjust the clamp before routing the hose.
A stable connection keeps airflow consistent and prevents unnecessary movement while driving.
Mistake 3: Bending the Hose Too Sharply
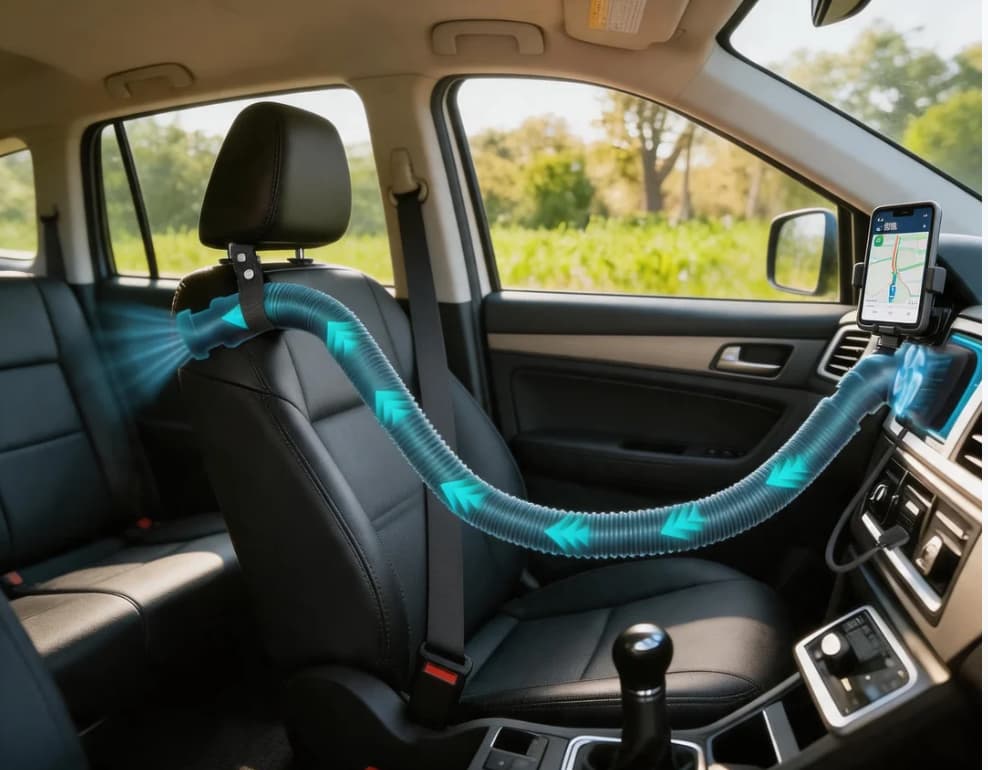
Flexible hoses are designed to move around the vehicle, but they still need a clear airflow path.
A common mistake is creating sharp corners when routing the tube around seats, consoles, or luggage.
Think of it like a garden hose. A tight bend restricts the flow.
For the best performance:
- Keep curves smooth and gradual.
- Avoid pressing the hose under heavy bags.
- Do not fold the tube tightly during storage.
An adjustable hose extending up to 6.6 feet (2 to 6.6 ft) gives enough reach for SUVs, minivans, and trucks, but the routing still matters.
When you finish your trip, the lightweight flexible hose can collapse down for compact storage in a cargo bag or glove box.
Mistake 4: Choosing the Wrong Hose Route for Your Vehicle
Every vehicle layout is slightly different. The cleanest installation depends on where passengers, pets, and cargo are located.
Sedan Installation
For smaller vehicles, the easiest route is usually along the side of the center console or underneath the front seats.
Keep the hose away from foot areas and avoid pressing it against sharp interior edges.
SUV and Minivan Installation
Three-row SUVs often have the biggest airflow challenge because the third row sits farthest from the factory vents.
For these vehicles, routing the hose along the side of the second-row seats usually provides the cleanest setup.
This works especially well for:
- third-row passengers;
- rear-facing child seats;
- SUV cargo dog crates.
Truck Installation
For pickup trucks, mounting the outlet behind the front seat headrest keeps airflow directed toward rear passengers without taking away legroom.
Mistake 5: Blocking the Rear Air Outlet
Even a powerful airflow system cannot work properly if the outlet is blocked.
This is easy to miss when traveling with kids or pets.
A backpack pushed against the nozzle, a blanket covering the outlet, or a dog crate positioned too close to the airflow opening can reduce performance.
Before driving, check that:
- Child safety seats are not covering the outlet.
- Dog crates still have enough airflow space.
- Cargo items are not pressing against the hose.
For families with rear-facing infant car seats, positioning matters even more. Thick seat padding can trap heat, and factory dashboard vents often struggle to deliver comfortable airflow behind the front seats.
Mistake 6: Ignoring the Installation Angle
Where the air points matters.
For children and adult passengers, aim the nozzle toward the seating area rather than directly at someone’s face.
For pets, especially during long drives, avoid pointing a continuous airflow stream directly into their eyes or nose.
A small angle adjustment can make the difference between uncomfortable airflow and a much more balanced cabin temperature.
Pro Installation Tips for Better Airflow
A few simple adjustments can improve everyday performance:
Use air recirculation when appropriate.
During hot summer drives, recirculating already cooled cabin air can help your AC system work more efficiently.
Match the nozzle position to the passenger.
Third-row passengers usually benefit from airflow directed downward from above, while dog crates often work better with airflow entering from the side.
Check the hose after long trips.
Vibration and movement can slowly change positioning, especially on rough roads.
Small adjustments are often enough to restore strong airflow.
Quick Installation Checklist Before Your Next Drive
Before hitting the road, check:
✓ Is the vent connection fully sealed?
✓ Is the clip securely attached?
✓ Is the hose routed with smooth curves?
✓ Is the outlet pointing toward the passenger area?
✓ Is the hose clear from luggage, blankets, and pet supplies?
✓ Are child seats or dog crates blocking airflow?
✓ Is the USB cable safely secured away from pets?
These quick checks take less than a minute and help maintain consistent airflow.
FAQ About Car AC Vent Extender Installation
Q: Why is my car AC vent extender not blowing strong air?
Weak airflow is usually caused by installation issues such as air leaks, sharp hose bends, blocked outlets, or poor positioning. Check the vent seal and hose route before replacing the product.
Q: Can I install a car AC vent extender without modifying my vehicle?
Yes. Most quality extenders use clip-on installation and USB power, requiring no permanent modification to your vehicle.
Q: Does a powered vent extender work better than a regular hose?
The main difference is airflow consistency. Passive tubes rely completely on factory AC pressure and may lose strength over longer distances.
A powered model uses an airflow boosting fan to help maintain stronger delivery, especially in larger SUVs and vehicles with third-row seating.
For a detailed comparison, check our guide on fan-powered vs passive vent tubes.
Q: Can I use a car AC vent extender for a dog crate?
Yes. With proper routing, an extender can help deliver conditioned airflow to dog crates placed in SUV cargo areas.
For pet travel, make sure the hose is secure and the outlet is positioned safely.
Final Thoughts
A car AC vent extender installation does not need to be complicated. Most airflow problems come down to small details — sealing, routing, positioning, and stability.
For families dealing with hot third-row seats, uncomfortable dog crates, or uneven cabin temperatures, a properly installed fan-powered AC vent extender can be a simple upgrade without modifying the vehicle.
With features like a sealed rubber gasket, reinforced clips, adjustable hose extending up to 6.6 feet (2 to 6.6 ft), and flexible mounting options for headrests or grab handles, it helps bring comfortable airflow to the areas your factory vents struggle to reach.
Make every seat more comfortable on your next road trip.